Friday, July 31, 2015

Quilt Basting

I spent the morning pinning two quilts ready for quilting.  

The local gallery run by the regional arts group is an ideal place to put two tables together and pin quilts and today it was a hive of activity.  Watercolour painting, spinning, sewing happy pants and lots of chatter.  The quilt above is another scrap quilt which has been foundation pieced.

I also had time to pin another baby/cot quilt.  I like to have a couple quilted and on hand as they make fantastic baby shower presents.  This 'owl themed' quilt is made using an ABC panel and I tried out a new setting.  I think it will come up looking good when quilted.

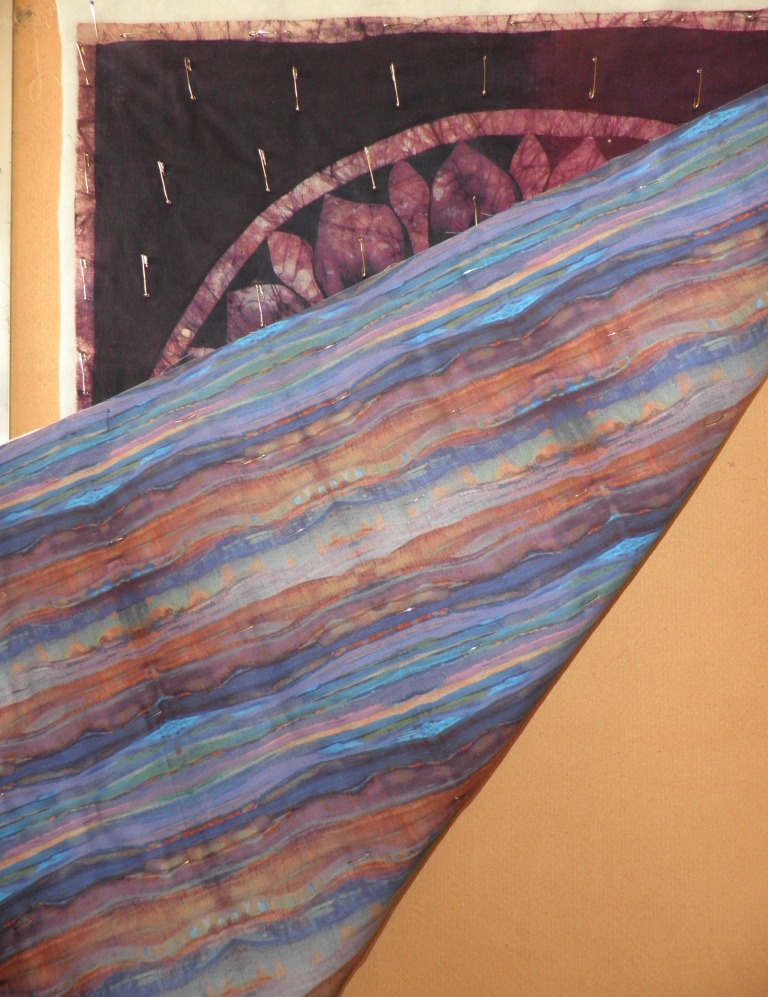
One of the ladies had brought in 4 panels which she was going to cut up and use to make happy pants.  As soon as I saw this one, I told her 'No, you can't cut them up', I want to quilt this one'  LOL   When we explained what we could do with them, she got excited and thought it would be a great idea to have them quilted and she could either hang them as wall hangings or join them together to make a bed quilt.    I came home with two and have pinned this one ready for quilting and then embellishment.

I had this nice piece of fabric that I used for the backing.


Happy quilting  !!


Thursday, July 30, 2015

Sewing Machine Cover & Bits n' Pieces

My Janome sewing machine now has a cover !


I had some blocks left over from a panel featuring these lovely sewing ladies so what better way to use them.  The above photo is the front section.  Below is the back.
The background fabric is sewing words and came from Spotlight.  The side panels got their own special lady too.

This morning I made a 'sample' block of this tractor. 

This block will be used for one row in a Row by Row quilt with an agricultural theme.

Another UFO I want to get finished is this 'mini Economy block' quilt using red/white/black fabric scraps.  I needed quite a few more foundations drawn up so these were done last night and I am now ready to sew.

Happy quilting !


Tuesday, July 28, 2015

Photography and Quilts

Taking a photo - it seemed easier to shoot a pic of the kids, the dogs or hubby asleep. 


 But put a camera in my hand in front of a quilt and my photography skills are seriously lacking.   Until 3 years ago I struggled to take any sort of decent photo of my quilts.  Then I decided to have an outdoor quilt display and use temporary fence panels to hang them on.  So of course before the display, I had to try one out so off to the hardware store we went and bought one which is now permanently attached off my patio.   The temporary fence panels worked well for the display.

Today, no rain and only a slight breeze and not too cold - pleasant winter's day in Tasmania and a perfect time to take a photo of some quilts before they are packed away.  

Here is my latest selvedge quilt using both plain and writing selvedges.  The binding is also a selvedge.


'Falling Selvedges' was time consuming to make but so much fun.  The top and bottom sections are foundation pieced as is the middle background sections, all from selvedges.  The 'falling' selvedges are raw edged machine stitched onto the background and then they are all individually machine quilted around.    I love this quilt.


Another UFO also had its binding stitched down over the weekend so it can now go to a good home.


Happy quilting  !!


Sunday, July 26, 2015

Storing Selvedges


The Selvage Along on Quilts of a Feather asks today :  It's link up your selvages day! We are wondering, how do you store your selvages?

I must admit my selvedge collection is all over the place.  Here are some kept in containers I made using papier mache (my other hobby).


Others are kept in a plastic (doona) bag - I find these bags are great for keeping my quilting project together in one place.


Sometimes I go through and sort the writing selvedges from the plain ones, other times they are all thrown in together until I am working on a specific project, really there is no semblance of order.


The selvedges in the green container are the latest ones gathered and are 'earmarked' for my next selvedge quilt, foundations are all drawn up and it's ready to go.

Happy quilting !!


Saturday, July 25, 2015

Butterfly using Selvedges Tutorial

I am often asked how I sew my selvedges together so I will share this little tutorial I have done.
My butterfly outline is traced onto vilene, and half inch guidelines are horizontially drawn.


I choose the two selvedge strips I want to start with and place then on the foundation as shown


I sew along the selvedge edge as close to the edge as possible as shown below

Continue sewing the selvedge strips onto the foundation as shown, this is what the front of the butterfly foundation looks like before it is trimmed.

Turn the foundation over and cut around the butterfly outline leaving about 1/2 inch seam.

Here is the butterfly foundation trimmed and ready for the visoflix to be attached. 


Once the visoflix has been attached, cut around the butterfly on the actual outline and then fused onto the background fabric.


Here is the finished quilt


Happy quilting !


'Saturday Patchers' Sewing Day

Today was our monthly 'Saturday Patchers' sewing day and it was nice to sit inside a warm room with great company and sew and chat!

I worked on foundation piecing more blocks for my Eastern Sunrise quilt.   Love this pattern as it gives you some nice negative space between the scrap rows to do the quilting.


Janine and Lesley were also working on their foundation piecing, dipping into our combined scrap stash for inspiration.  


And look what the postie delivered yesterday, another little package of lovely fat quarters to add to my 'scrap fabric stash'.


Happy quilting !!


Thursday, July 23, 2015

Quilt Binding

Not one of my favourite parts of making a quilt, but necessary to get the quilt finished so it can be used.   I wanted to use a selvedge on this quilt but as it is 45" x 45", I didn't really have enough white/cream/beige selvedges to make a binding...until...I bought 3 metres of a white fabric to use as a background fabric in another quilt.  The selvedge was perfect so I cut the selvedge off the length of the fabric at 3" and folded it in half.


I laid the selvedge along the edge of the quilt at 1/4 inch in from the quilt edge with the selvedge edge facing into the quilt 


I sewed the selvedge edge to the front of the quilt along two sides as shown here


Then turned it over and hand stitched the binding to the back of the quilt.   Added the other two sides and will stitch them on the back tonight.


Not normally how I would attach a binding but hey sometimes you have to be a little bit creative to get a satisfying end result and I am pleased with how this method has worked.

Happy quilting !